Maps and rooms / GUIDE 11
Changing Floors Without Accidentally Coming Straight Back
You know the last hider must be upstairs, but a rushed trip on the stairs leaves you downstairs again. Or you walk onto the elevator picture and wait for something to happen. Both problems come from treating the two ways upstairs as though they work alike. Learn one calm arrival routine and you can use either route confidently, whether you are clearing the house or finding a hiding place before preparation ends.
Find the two options in the corridor
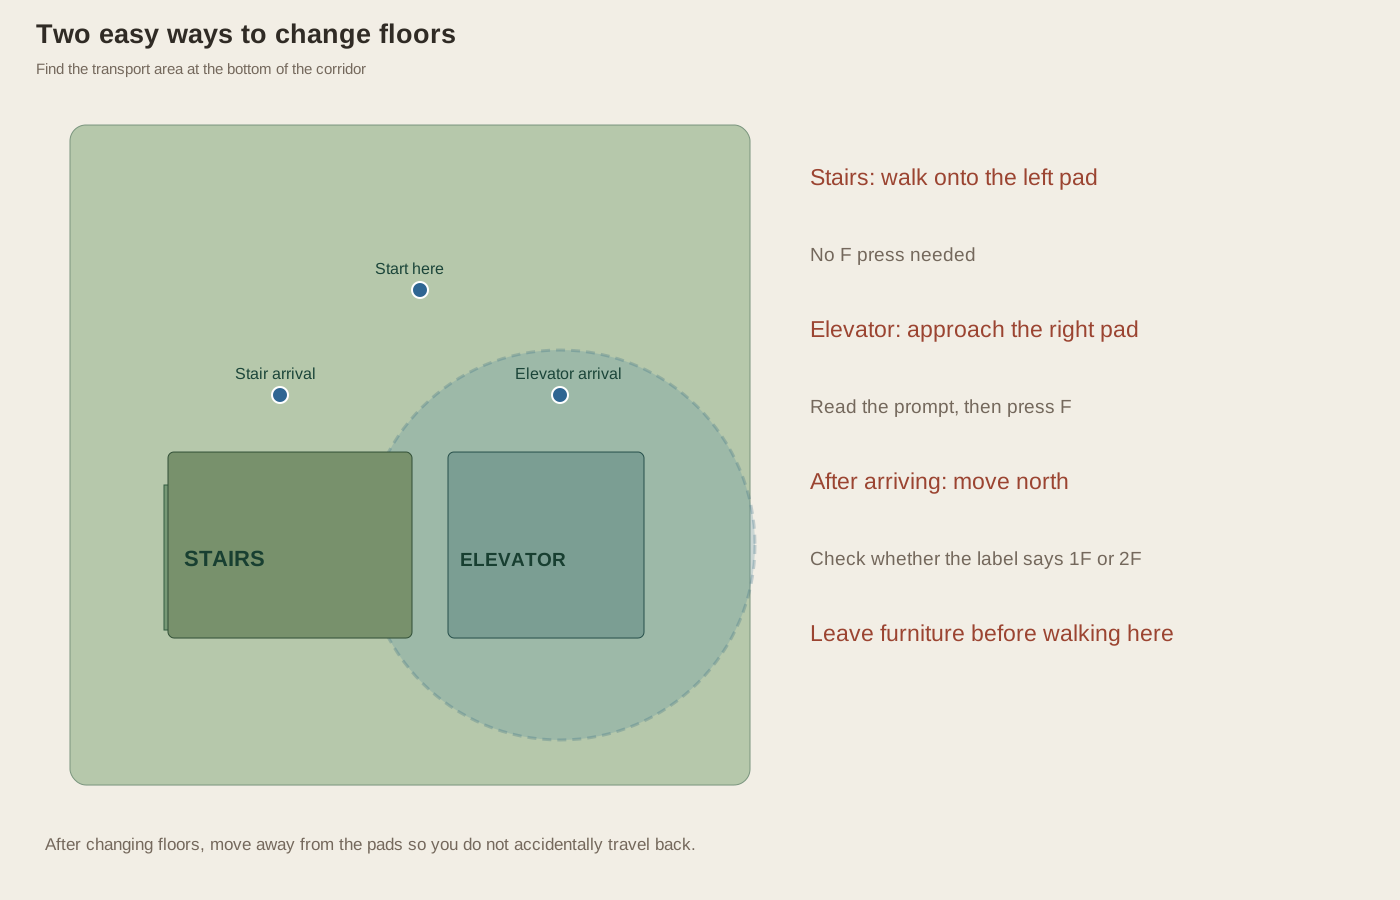
The transport area is at the bottom of the central corridor on both floors. The stairs are on the left, while the elevator is on the right. Both connect downstairs and upstairs. You do not have to choose a destination from a menu, collect a ticket, or unlock another part of the house before using them. There are only two floors to travel between.
Before heading down the corridor, decide which option you want. This avoids a diagonal movement that drifts onto the stairs while you are trying to reach the elevator. Check the location label if you are already unsure where you are. A floor change is useful only when it takes you toward the rooms you still need to visit.
Walk onto the stairs and then move away
The stairs work through movement. Walk onto the left pad near the bottom of the corridor and your character changes floors automatically. You do not need to press F. Once the arrival settles, move north away from the pad and confirm the new floor label. That brief change in direction is the most useful habit for preventing an unintended return trip.
If you keep holding a downward direction after arriving, your character can walk onto the stairs again. You may then travel back before you have entered a room. When this happens, do not try to correct it with several hurried key presses. Release movement, read the floor label, and make one deliberate trip to the floor you actually want.
Use the elevator with a separate F press
The elevator needs an interaction. Approach the right-hand pad until the prompt offers an elevator trip, then press F once. Walking onto its picture without pressing F does not operate it. After the arrival message, move north into the corridor and check the floor label before turning into a room. This is the same calm arrival routine you use with the stairs.
Give the transition a moment before attempting another trip. Repeated rapid presses can leave you uncertain whether you have traveled or are still waiting for the previous arrival to finish. Release F between actions, read the prompt, and press again only when you mean to change floors. The elevator is convenient because it lets you choose the exact moment of the trip.
Include floor travel in your hiding plan
If you are hidden in furniture, press F to leave before trying to reach transport. That first press only steps you out of your current spot. You then need to walk to the corridor and use your chosen method. Do not count on a single key press to move you directly from a wardrobe to another floor.
Practice an upstairs opening with one seeker before using it against several. During the preparation countdown, travel once, move away from the pads, enter a known room, and hide. Check Hidden rather than assuming that reaching upstairs has completed the job. Seekers can search both floors, so the trip is a way to reach another hiding choice rather than a guarantee of safety. In seeker rounds, use the same routine after finishing a floor's checklist. A controlled arrival saves more confusion than a hurried crossing that sends you back to rooms you already cleared.